Today’s post comes from Rachelle Law, a Discovery leader at Sleeping Giant Provincial Park.
Are you looking for a fun do-it-yourself project to do this summer?
Would you love a solution to the amount of pesky mosquitoes in your backyard?
Are you passionate about creating habitats for wildlife?
If you answered yes to any of these questions, this blog is for you!
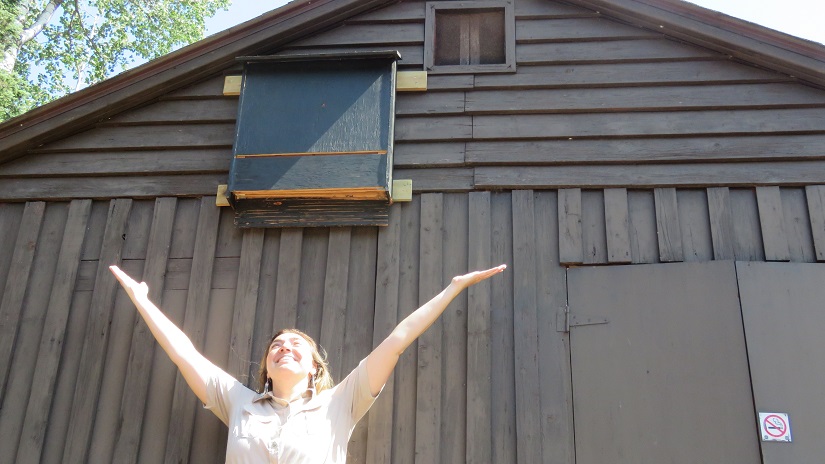
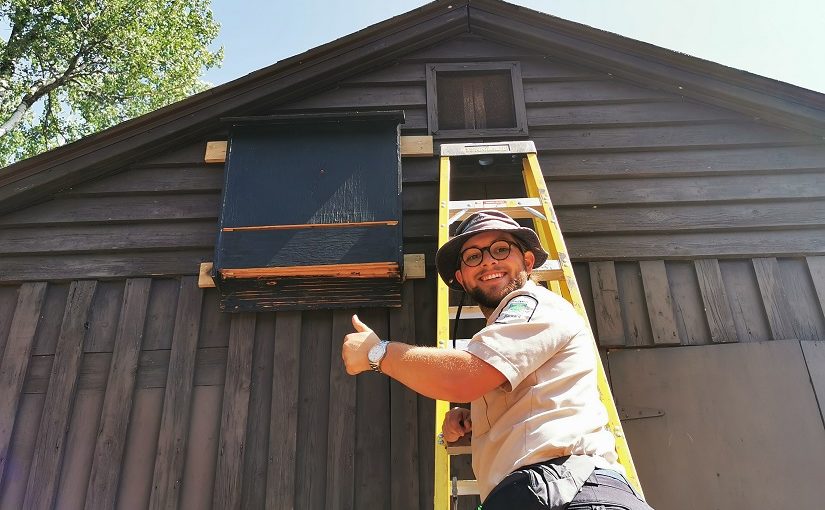
This year, Sleeping Giant Provincial Park needed a new bat house to provide habitat for bats in the park. We took on the challenge of building our own!
Why build a bat house?
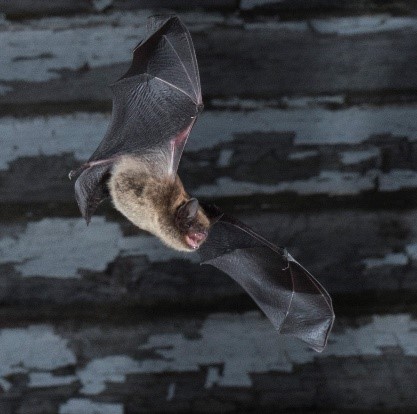
Our new bat house will help us monitor bat health and populations of various species found in the park. Here at Sleeping Giant, we are passionate about protecting, researching, and monitoring the diverse wildlife in the park.
A bat house can:
- help to keep mosquito populations down on your property as bats love to eat mosquitoes. In fact, some Little Brown Bats can eat up to 1000 mosquitoes per hour!
- provide an alternative habitat to prevent bats from living in your attic or other parts of your home
- help bat populations in your area that may be decreasing or struggling due to White Nose Syndrome, habitat loss from deforestation, and pesticide use
Bats have many important roles in our ecosystems, including helping to pollinate, spread seeds, and control pests. They are also a significant part of the food chain.
For more on bats in Ontario and their importance, click here.
Where should your bat house go?
Your bat house should be placed in a spot where it will get at least eight hours of sunlight, preferably facing south.
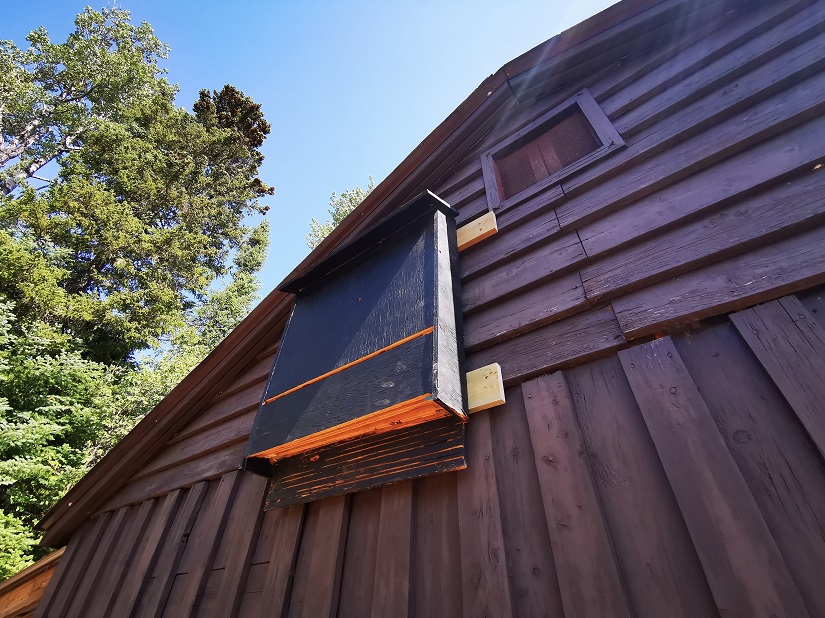
It should also be:
- installed 10-20 feet above the ground
- about 300 meters from a water source
- in a spot free of light pollution
Ensure the front of the bat house is free of obstructions, including anything that might block the entrance or the bat’s flight path.
Place on the side of a house, or other structure like a pole. If installing on a tree, ensure there are no branches under or over the bat house, as bats need plenty of space to swoop their way inside.
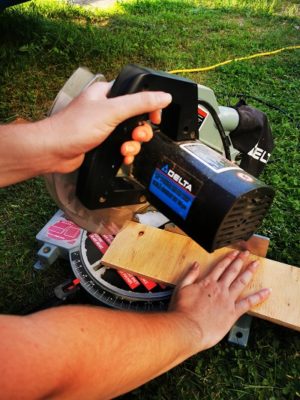
Building your bat box
*Safety reminder* Be sure to use proper protective equipment (like safety goggles!) when building your bat house. If you’re new to projects like this, ask a more experienced friend to help!
Step one: gather your materials. You will need:
- sheet of 1/2″ thick exterior grade plywood
- 1″ x 2″ wood strips
- black or brown exterior water-based paint or stain (non-toxic)
- exterior grade screws
- paintable silk latex chalk (if it’s not in a squeeze tube, you will need caulking gun)
- sand paper or sander
- cloth or rag
- power drill (with necessary drill bits) or screw driver
- hole saw add-on for drill with a diameter of around 1 1/2″
- bracket to attach bat box to tree
- roofing shingle attached with roofing nails (optional)
- tape measure
- paint brush or paint roller
- table saw (or get the hardware store to cut the wood for you)
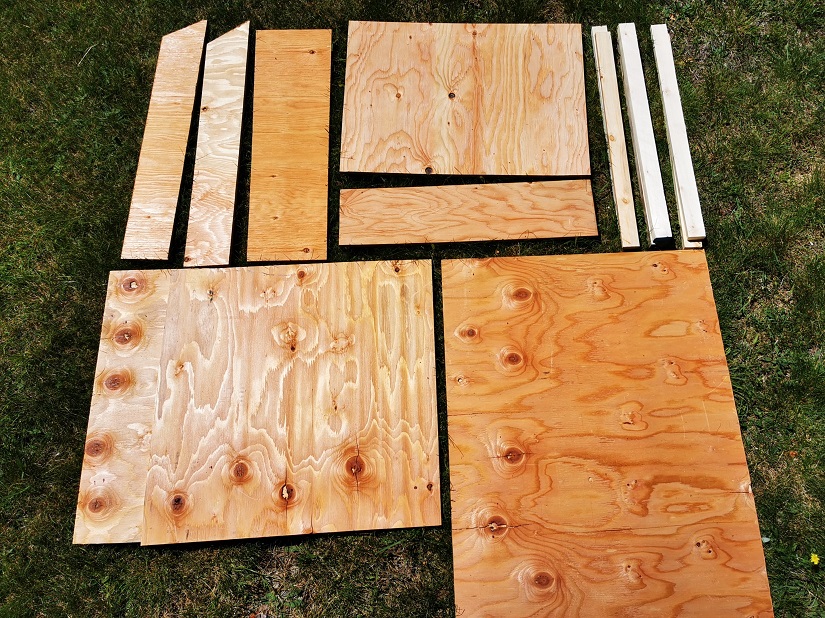
Step two: cut your wood.
You can make your bat house any size, but ensure it is at least 20″ tall and 14″ wide. The larger your bat house is, and the more chambers it has, the more bats can roost. Having additional space can help bats raise more young.

You will need to cut:
- a roof
- two side pieces with an angle for the roof
- a front panel made of two separate pieces (a taller top piece and a shorter bottom piece with a ventilation gap of 1/2″)
- roosting chamber(s) for the bats (at least one, but the more the better)
- back panel of bat house (this needs to be the longest piece as it needs to have enough space for a 4″ to 6″ landing pad for the bats. This allows the bats to swoop onto the landing and climb into their homes more easily)
- wood strips to place in between each panel of the bat house
The wood strips need to be at least 3/4″to 1″ thick to provide adequate space for the bats to roost. Little Brown Bats need 3/4″, and Big Brown Bats need 1″of space.
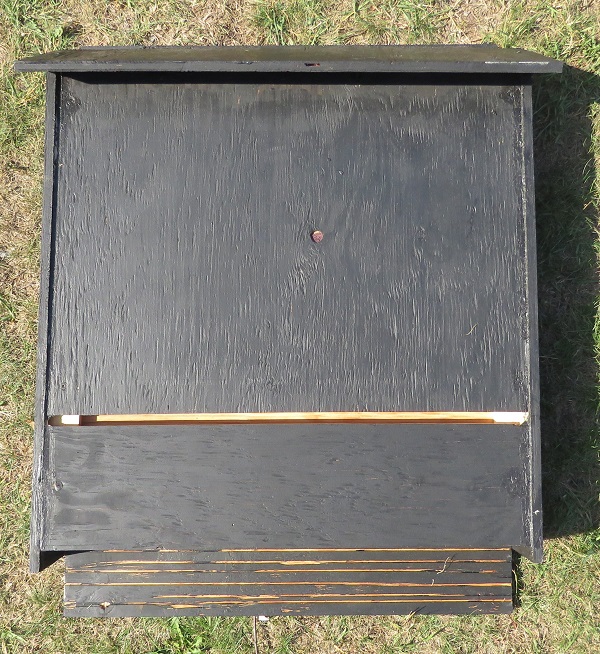
Here are the measurements for the bat house we built:
- roof: 26 1/2″ x 8″
- front piece top: 24″ x 18″
- front piece bottom: 24″ x 6″
- gap between top and bottom of front piece: 1/2″
- back: 24″ x 32″
- landing pad: 24″ x 5″
- roosting chambers: 24″ x 24″
- wood strips to separate chambers: 2″ x 24″ (need to be at least 3/4″ to 1″ thick)
- side pieces: 4 1/2″ x 27 1/2″ with a 30 degree angle
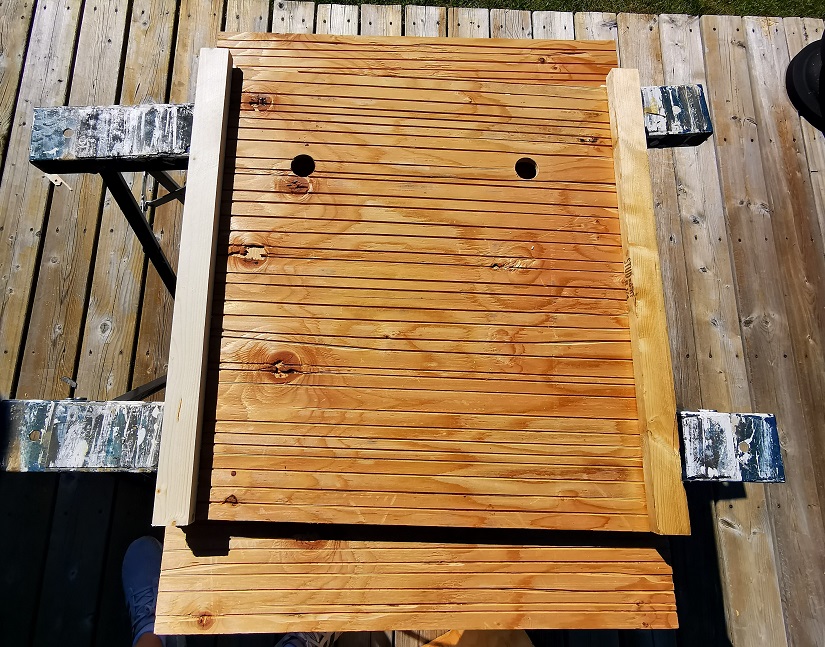
Step three: notch the plywood of the back of the bat house and the roosting chambers.

This can be done by using a table saw, circular saw, paint scraper, shop knife, or chisel. Notches can be at a depth of 1/32″ to 1/16″, and make sure to space the notches 1/2″ apart.
We used a table saw to cut the notches by lowering it down just enough so that it cut grooves into the wood without completely cutting the wood.
The notches mimic tree bark and allow bats to properly grip on and move around their home.
You can also use plastic mesh for the roosting chambers, but it will not be as durable as wood notches, and you may need to replace it annually.
Step four: drill holes into the chambers of the bat house.

Use a hole saw add on for a drill. The holes need to be at least 1.5″ in diameter. Only drill holes in the chamber pieces and not in the front or back walls.
Place holes near the top of the chamber walls. This will help keep the bats warmer during cold weather.
These holes will provide a way for the bats to travel from chamber to chamber inside their home.
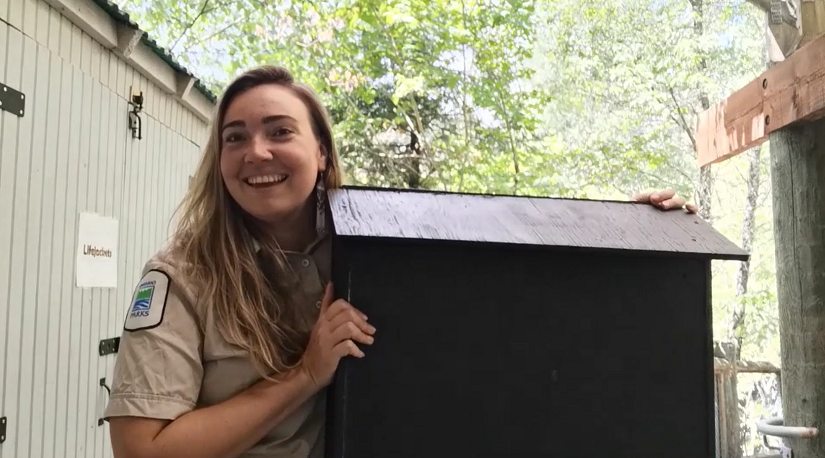
Step five: put together your bat house!
Make sure to use exterior grade screws to put together your bat house. You should also pre-drill holes to ensure the plywood doesn’t crack.
Use the wood strips to space out your layers of the bat house. Ensure the wood strips are at least 3/4″ to 1″ thick to provide enough space for the bats.

Make sure to align pieces so that you have enough room for the roof and the landing strip.
Step six: apply exterior paintable latex caulking.
Apply to any cracks in the bat box or places where you think rain may seep in. Caulking the edges of the roof is especially important. The caulking will help keep bats warm and dry inside.
Read the label of the caulk product to see how long it will need to dry. After it dries, it’s time to move on to the next step.
Step seven: prepare the bat box for paint or stain.
Use sand paper or a sander to sand down the exterior of your bat house. After sanding, use a rag or old cloth to remove any dust from the exterior.
Step eight: paint or stain your bat house.
You must use exterior grade water-based stain (non-toxic).
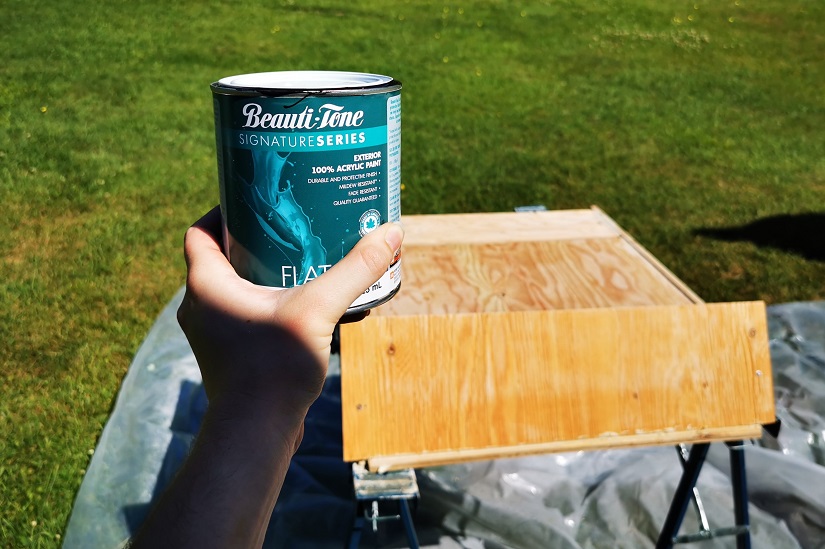
The paint or stain should be dark to reflect the temperatures of the area you live in. The colder the climate you live in, the darker your bat house should be. Dark colours attract sunlight and heat which helps to keep your bats warm.
Leave paint to dry for the recommended time found on the product label.
Step nine: install your bat house!
Attach a bracket to the back of your bat house, or use another appropriate method to attach it to the desired surface.
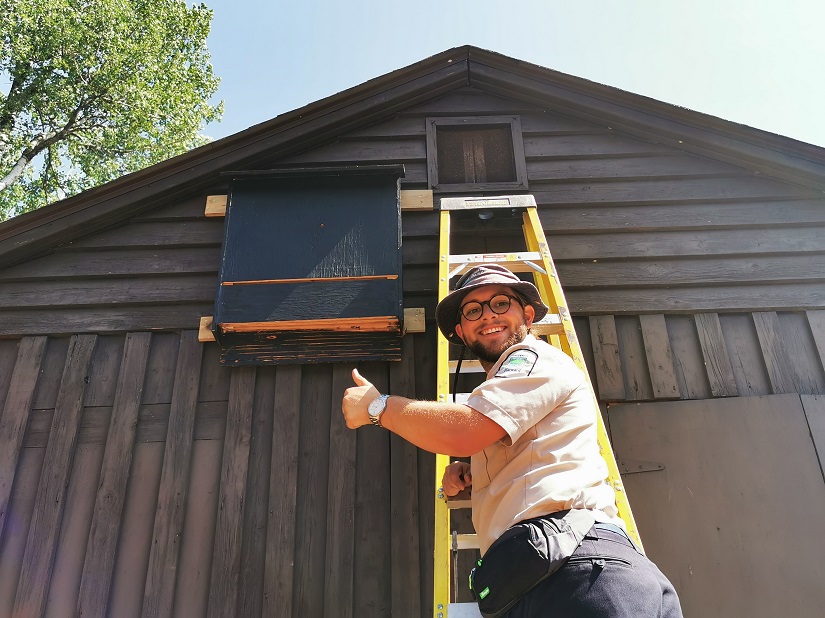
Find the best spot to place your bat house. Remember to refer to the guidelines we mentioned above about where to place it.
Where you place your bat house will affect the likelihood of bats moving in, so make sure it’s in a great spot.
What now?
The fun doesn’t have to end after completing your bat house!
Here are some exciting things you can partake in afterwards:
- monitoring projects: Join the “Help The Bats” project on iNaturalist with Canadian Wildlife Federation here
- observation: Enjoy watching your bats at nighttime. This is a great activity to do with family and friends, especially children and youth to get them excited about the natural world
- share with us: Tell us about your experiences building your bat house on social media. Tag us in your photos @ontarioparks!
- be respectful: Bats do not like to be disturbed, so only check in on your bat house when its necessary or needs repair
Best of luck building your bat house! We thank you for your contribution in protecting bats and providing essential habitats.